How to Make Easy Modern Trees For Christmas
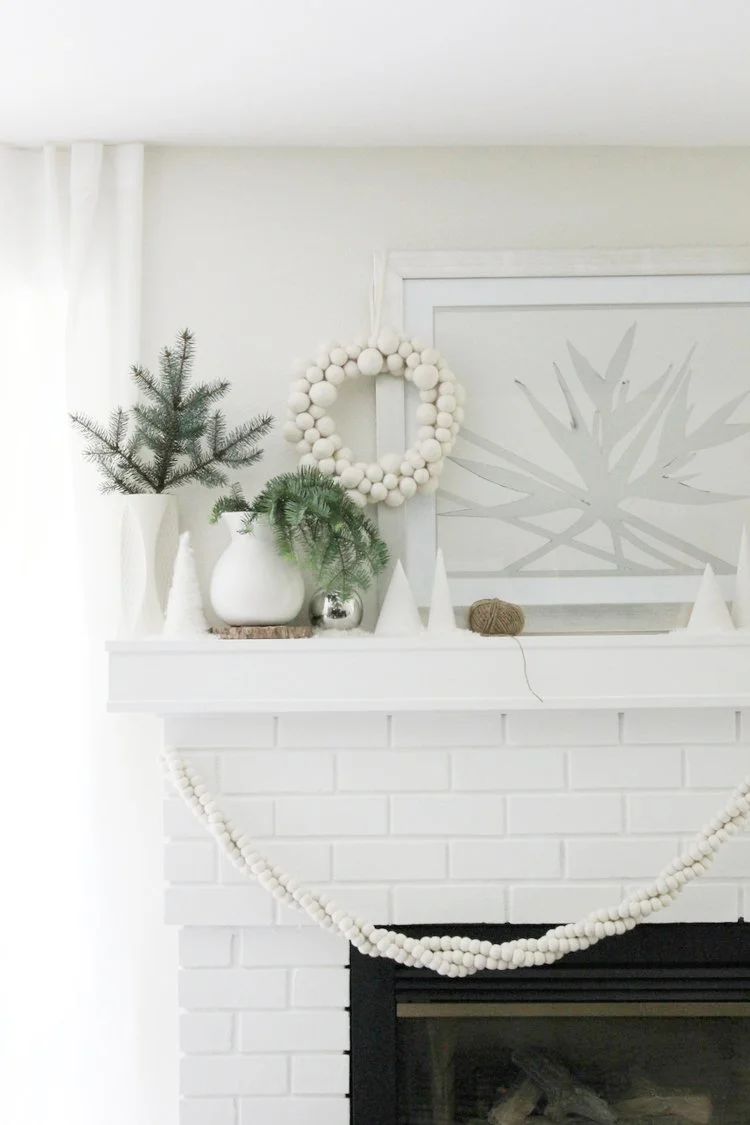
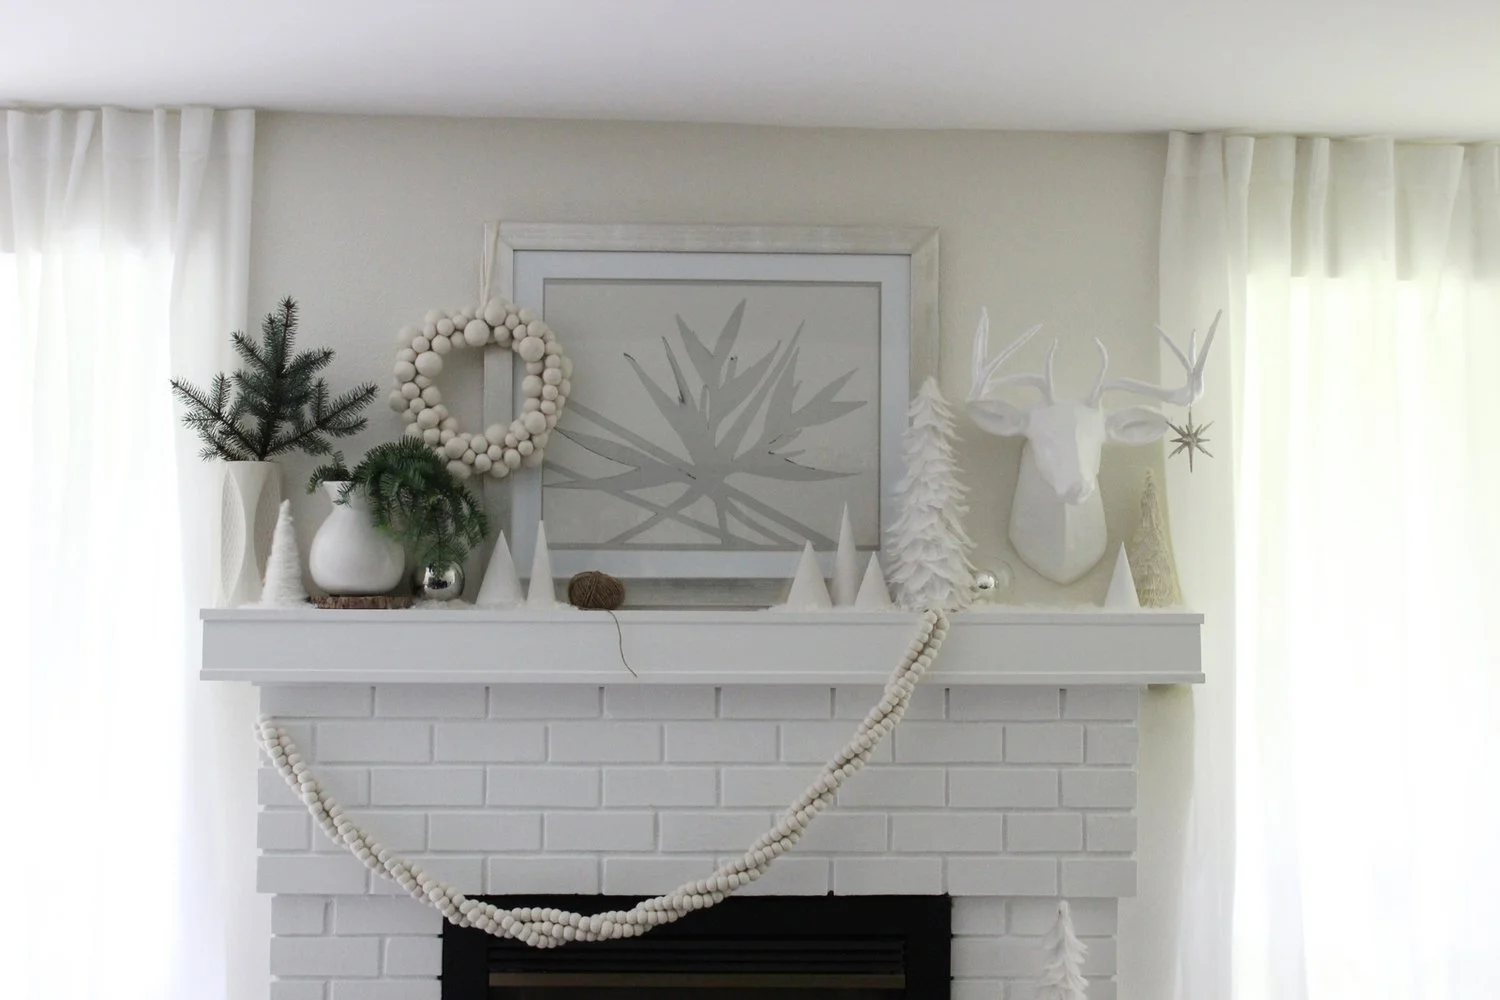
Keep it simple. Sticking in a single palette can really pull together a mantle. Using various shades of winter white is a great way to keep your living room feeling fresh and modern. A few years ago I was asked to style a holiday mantle for West Elm. I wanted to create something simple, but festive. I also wanted something that could last through to New Years. A wintery mantle scape was my solution. I accented my favorite pieces from West Elm with little plaster trees I made using party hats. A quick and easy DIY, that creates a modern little forest of trees that all turn pure white as soon as they dry.
You will need:
Party Hats
Tape
Plaster
Water
Plastic Fork
Large Plastic Bag
Plastic Measuring Cup (not for food use)
Small Plastic Bucket
Mason Jars (large mouth)
Paper Towels or Rag
I always seem to have a stack of party hats sitting around and one day I had a bunch out on the table for a shoot. It looked like a forest. I decided to use them as a simple and quick mold to make plaster trees.
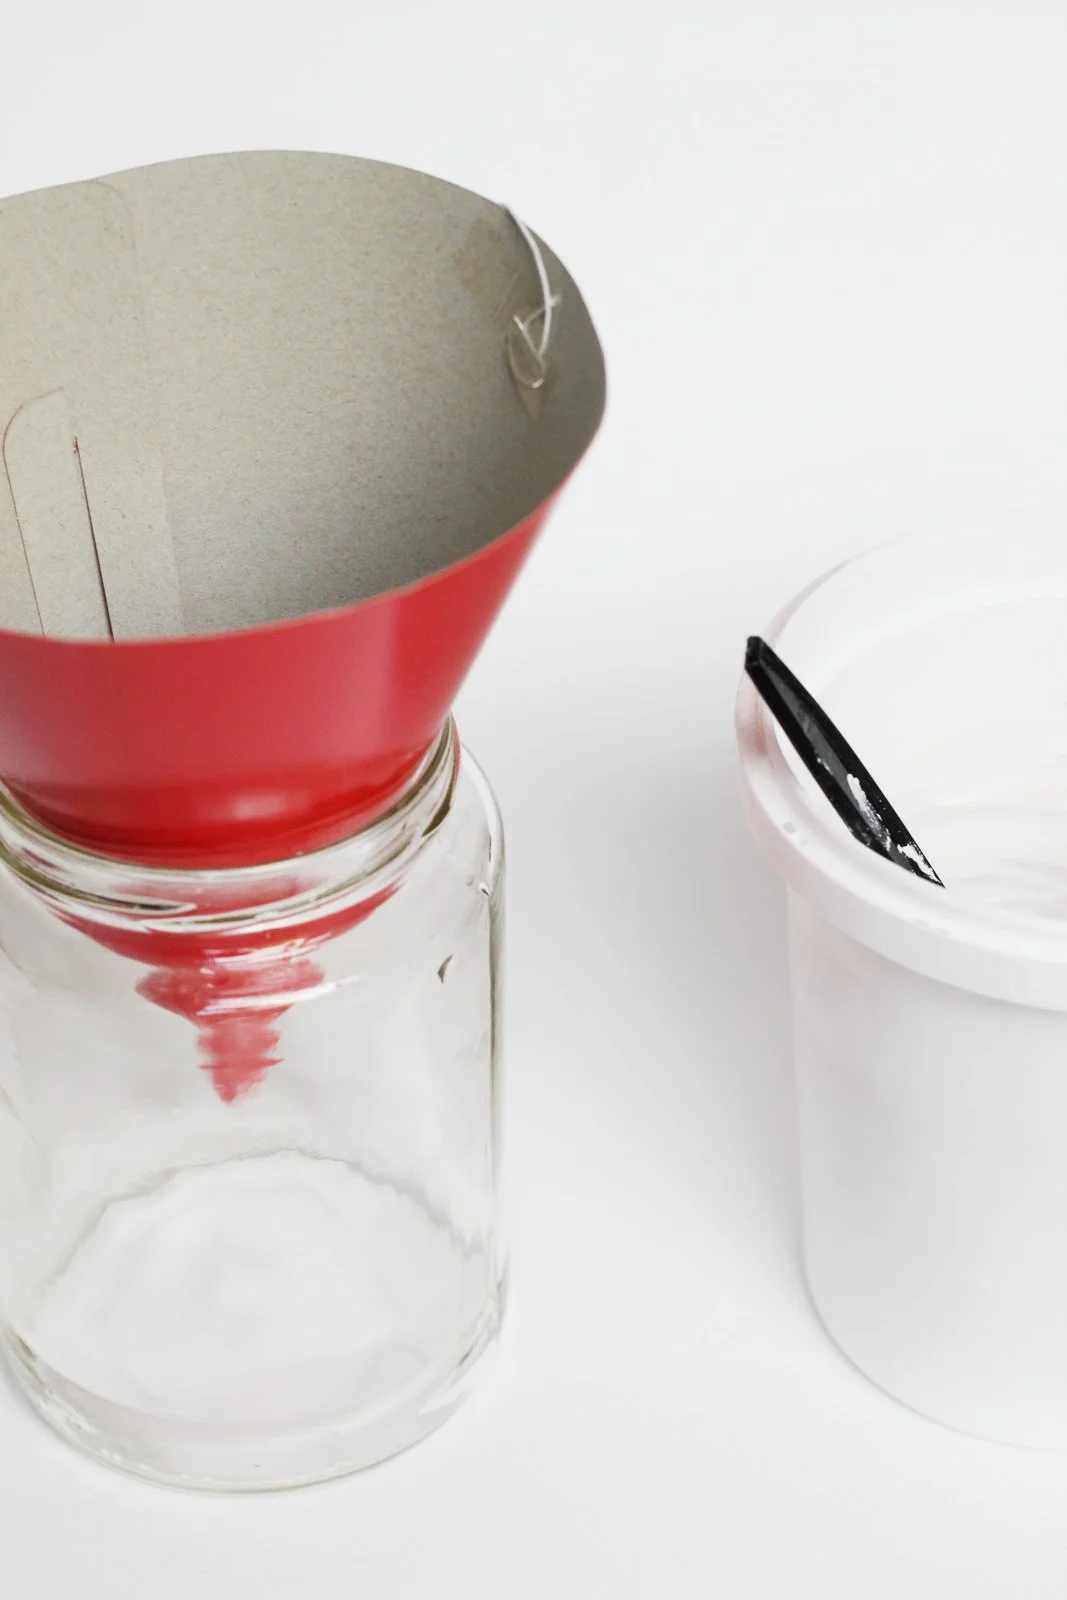
Step 1: Take a party hat and seal the seam and bottom hole with tape; this will keep the liquid plaster from leaking out.
Step 2: Open the plaster and measure out 1 cup of powder into the plastic bag. Pour ½ cup of water into the bottom of the small plastic bucket. *Follow the directions on the plaster for exact measurements, typically it is 1 part water to 2 parts plaster.
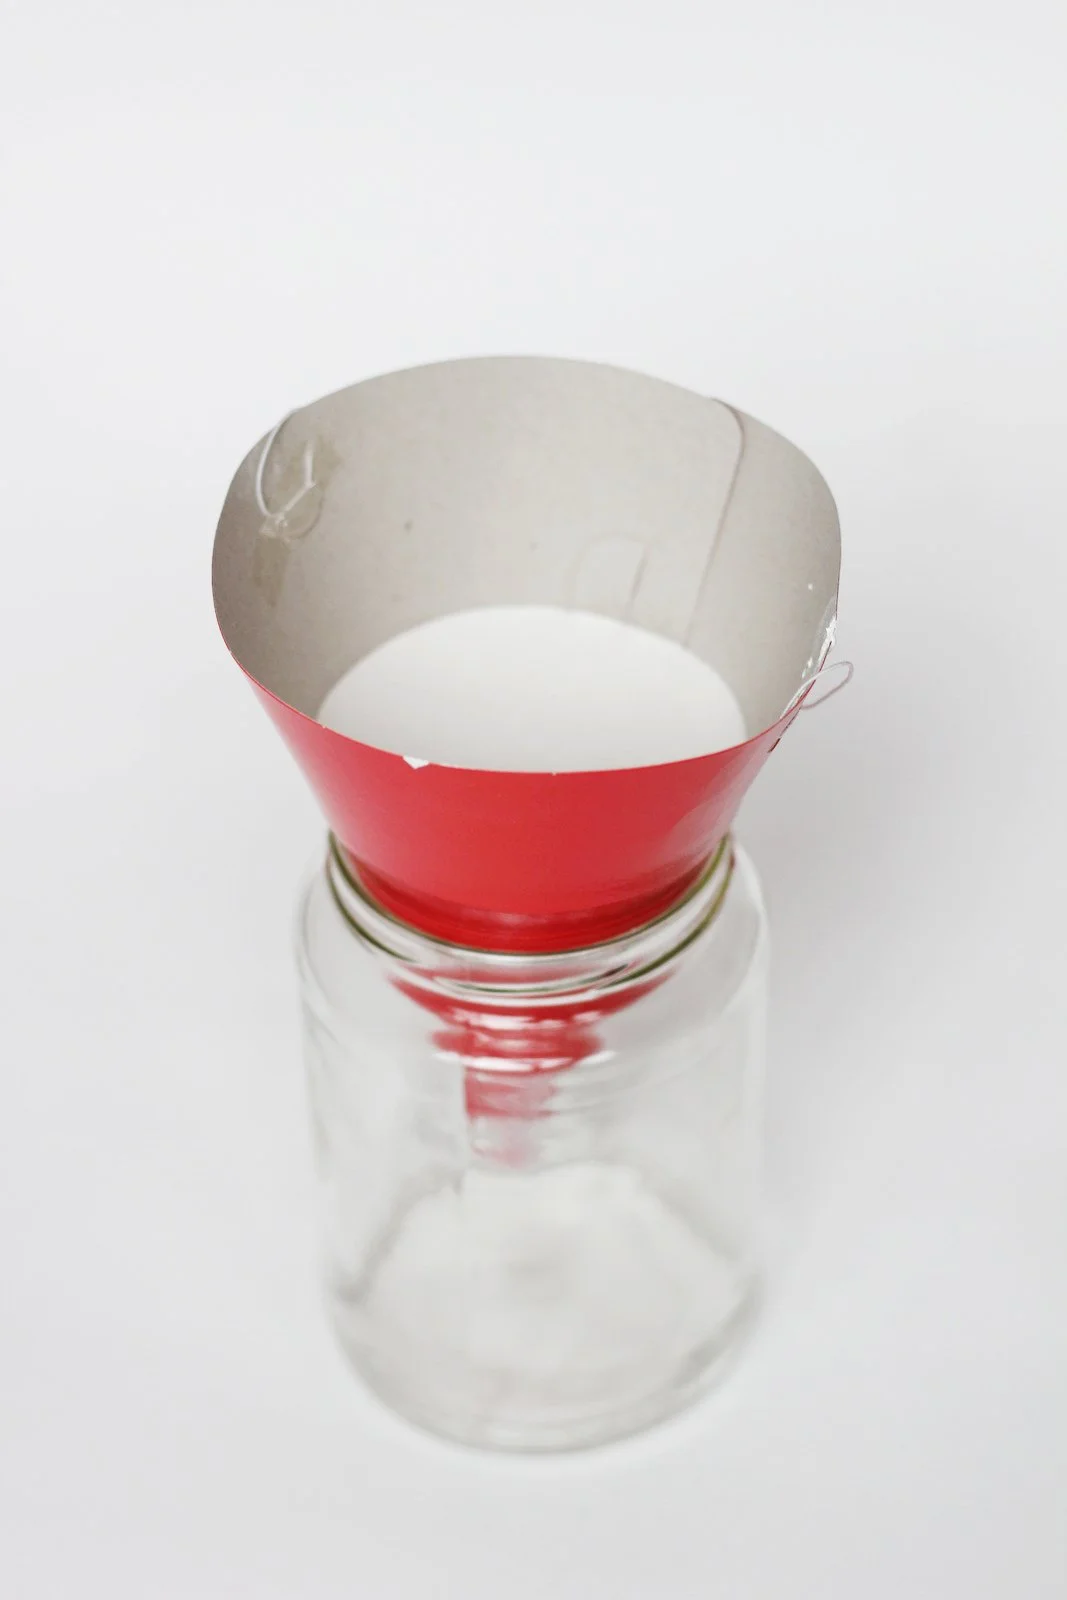
Step 3: Carefully pour the plaster from the plastic bag into the bucket. Mix well with fork. Place party hat centered and upside down in mason jar.
Step 4: Pour plaster mix into party hat. Tap party hat and jar a few times to even out the plaster and to remove any large air bubbles. Fill as tall as you would like the tree to be. Repeat with any remaining hats to make a forest. Mix each batch separately to get a good blending of the plaster.
Step 5: Let dry 60 minutes.
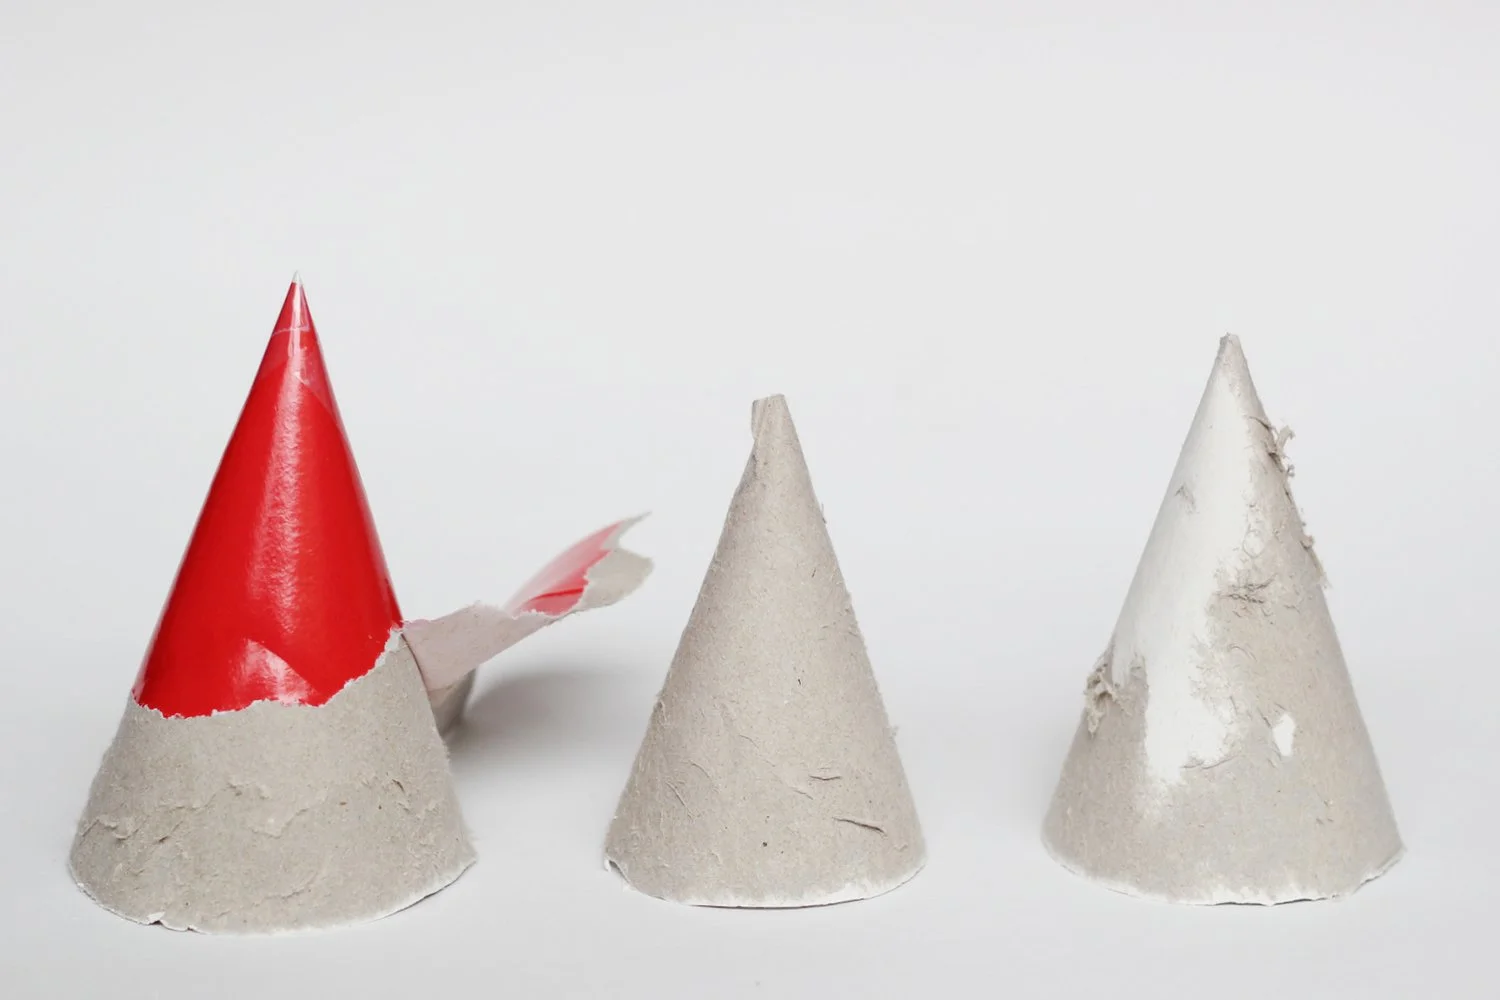
Step 6: Peel off the party hat, try to remove as much as possible. Some of the hat will still be stuck to the plaster, that’s okay, it rubs off easily.
Step 7: Rub off excess with a piece of paper towel or rag.
Step 8: Let dry for 48 hours. Smooth any unwanted imperfections with sand paper and paint, if desired. These were left unaltered.
If you would like to make additional shapes, you can roll a piece of card stock into a cone and change the height and diameter of the trees. Be sure to either use very thick card stock, or double up the cones if you use this method. The moisture in the plaster will seep with thin card stock.
Bonus DIY: 30 Second Twisted Felt Garland
Another trick to styling an interesting mantle? I took three of West Elm's felt garlands and twisted them. This makes it thicker but still keeps the shape really simple. Offsetting the garland to one side of the fireplace keeps it more modern. Yes it is still just a garland, but it's important to take the traditional and switch it up a bit. A twist on traditional, quite literally.
Take three strands of felt garland and lay them out flat side by side. Tie all three garlands together at one end using a piece of yarn or string that matches. Hang this end. Twist the other end, holding all garlands together until all three strands are one large twist. Tie and hang this side of the garland. Voila. Congratulations, you just created a giant twist garland, in less than 30 seconds.
I was thrilled to be featured on Front & Main, West Elm's amazing style blog and I got to host a DIY event at the Seattle store. So fun. I used the garlands to create the cutest napkin rings, which I never shared. It’s on the list, so stay tuned.
This post was originally sponsored by West Elm. All opinions are my own.
